Getting Started
This section guides you from the initial launch to the first recorded time entry.
First Start
- Start netTime from the Start menu, the application menu, or by double-clicking a
.nettimefile. - At first start netTime requests a one-time free registration with a Net-Base account. This starts the 30-day trial — details at Registration, trial period and license.
- After a short loading screen, the main window appears with the start page.
The Start page
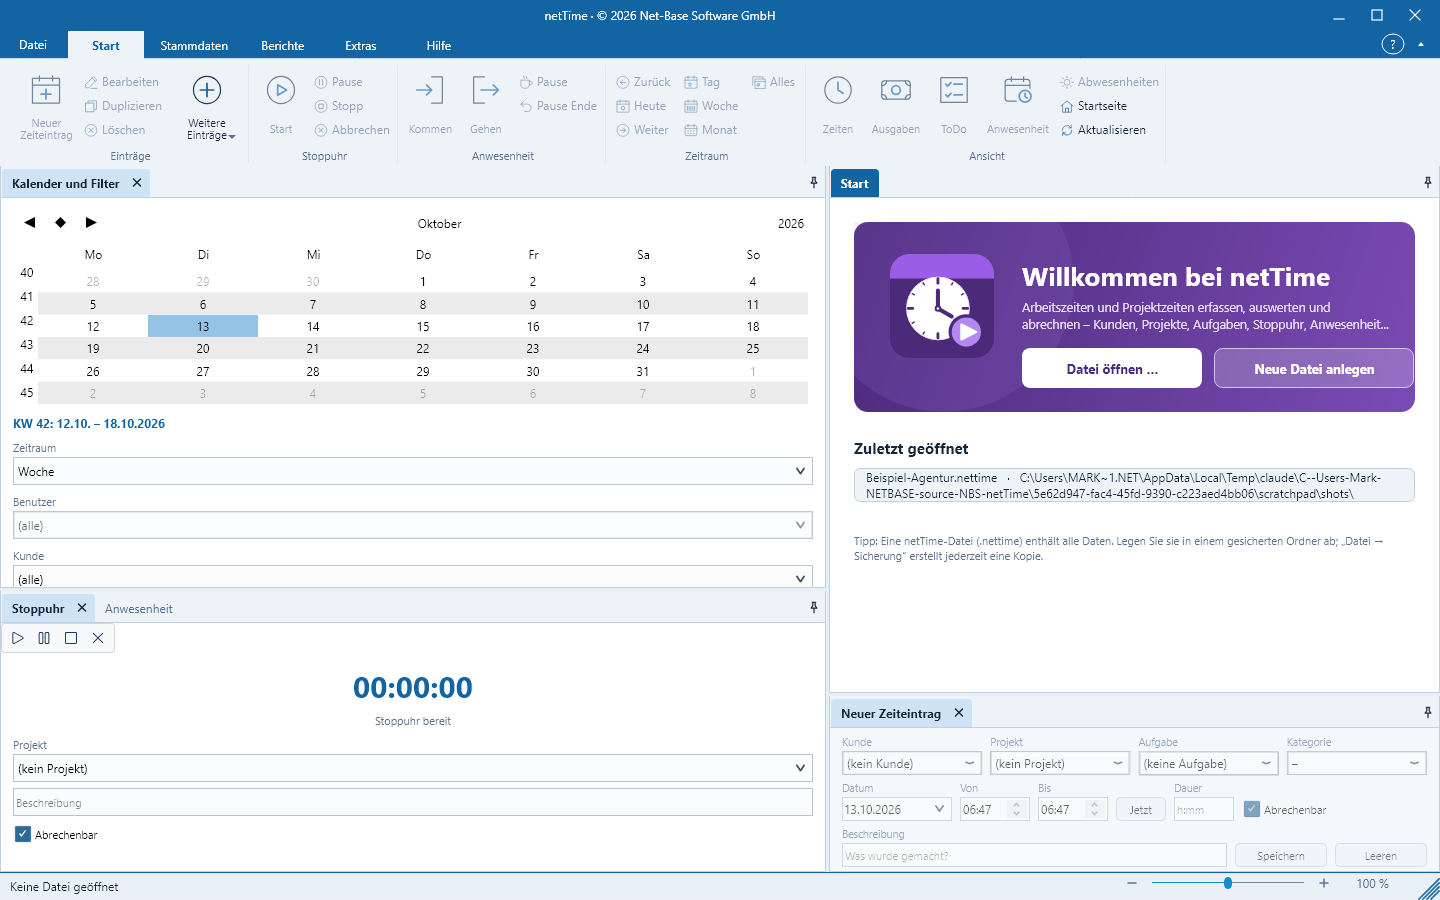
When no file is open, netTime shows the page pane Start:
- At the top the buttons Open file … and Create new file.
- Under Recently opened the most recently used files with name and folder. A click reopens the file.
- A tip reminds you to store the file in a secure folder.
Create a new file
- Click Create new file (or File > Open > Create new file …, shortcut
Ctrl+Shift+N). - Choose folder and name; netTime adds the extension
.nettimeautomatically. Suggested isZeiten.nettime. - netTime creates the file with presets: categories Intern and Extern, priorities High, Normal, Low, statuses Planned, Active, Completed, tax rates 19 %, 7 %, 0 % and absence types Vacation, Sick, Public holiday, Other.
- The file also contains an initial user admin with the role Administrator and without a password. Since there is only one user without a password, netTime logs you in without prompting.
- A note recommends creating customers and projects under Master data and setting your name and a password under Master data > Users.
After creating the file, netTime opens the list Time entries, on the left are Calendar and filters, Stopwatch and Attendance, and at the bottom the input area New time entry.
Create a customer and project
- Switch to the Master data tab and click Customers.
- Click Add in the list (or press
Ins) and enter at least the Name, for example Beispiel GmbH. An hourly rate and a rounding are optional. - Click Projects and then Add. Select the customer and enter the Name, for example Website-Relaunch.
A project cannot be created without a customer; netTime will then display Please create a customer first.
Record the first time entry
In the input area New time entry at the bottom:
- Select Customer and Project (optionally Task and Category).
- Check Date, From and To; Now sets the current time as the end. Instead of To you can also enter a Duration as
h:mm. - Enter under Description what was done and click Save – or press
Enterin the Duration or Description field.
The entry appears in the Time Entries list and is highlighted there. Alternatively, start the Stopwatch on the left and create the entry when you stop it; see The Stopwatch.
What next?
- Book arrivals and departures: Attendance
- Select time range and filters: Time range and filters
- Print timesheets: Reports
- Create a backup: Backup, Export and Import
Tip: The slider at the bottom right of the status bar sets the display size of the entire interface between 50 and 150%.